Apologies to my roommates (the robot garden saga)
So I’ve spent many months watering the walls of our rental in my attempts to test how close we are to Unlimited Food. I have a strong thesis that distributed food systems are the way of the future - in a world with infinite solar power and exceptional robots, obviously it’s optimal to have our robot gardens growing fresh food and our robot chefs preparing that food. There are arguments to be made that there will still be economies of scale and climate advantages to growing food in centralised locations, and I can go back and forth on that, but I think the ideal form of our food system has at least some portion of food grown autonomously very close to wherever you live.
Through the startup, I got to visit a variety of different robotic farms and agriculture conferences - most interestingly a state-of-the-art robotic mushroom farm being built by an engineer-turned-farmer. I wanted to see if I could build a prototype of some kind of food vending machine that would grow the food inside it, to see how far away my prophecied future might be - is it possible for the economics to work out with today’s hardware?
Obviously it had to grow a plant that was a) small, b) grew remarkably quickly, c) was expensive in small quantities (for the economics), and d) preferably didn’t require soil (for food safety). All signs pointed toward microgreens - which have the added bonus of having a lot of superfood hype and rarely being stocked in grocery stores because they are too delicate to transport (so a microgreen vending machine could be genuinely useful).
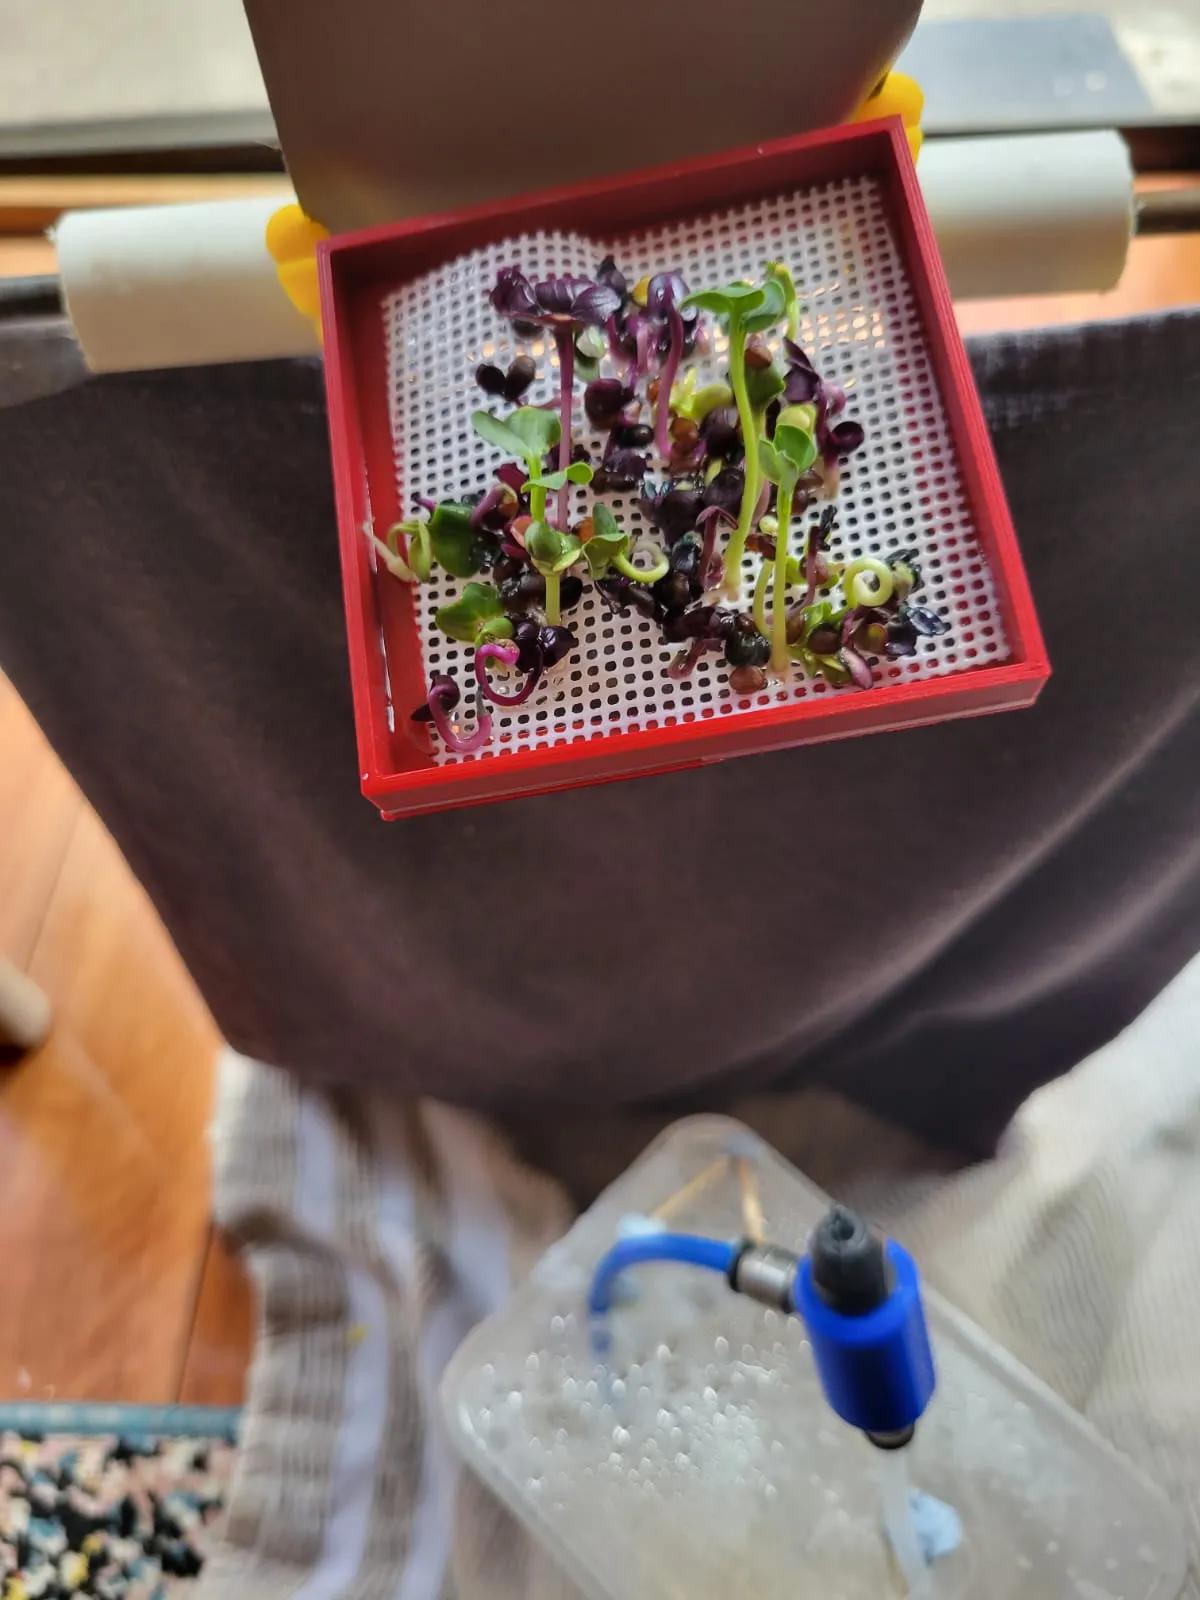 Radish microgreens, mid grow cycle.
The first constraint turned out to be the water. I wanted to grow the microgreens with aeroponics rather than hydroponics to avoid the maintenance (or potential hygiene risks) of having a bunch of water running through pipes. I thought it would be straightforward to spray water and nutrients onto a plant. I was wrong.
For the roots to optimally absorb the water-nutrient mix, the water droplets need to be under 100 microns in size. To create a spray that fine requires quite a lot of air pressure, and what you can’t have in a vending machine is an extremely large, noisy, and expensive air compressor. This, it turns out, is why traditional aeroponics setups are high-pressure systems.
After scouring the internet I ended up in the realm of Venturi-effect nozzles. I 3D printed a couple of open-source ones that didn’t do what I wanted. As I was about to give up on the internet and try to design my own nozzle, I found one site with a nozzle that they promised would produce droplets under 100 microns with air pressure of only 40 psi - much lower than any others. I figured they were my best bet, but they were based in America and the shipping fee would have been hundreds of dollars; so I recruited my brother (who was travelling in New York at the time) to bring it home for me.
I have to say I have an extreme level of respect whoever designed this nozzle - it is a cool bit of engineering. It was also more expensive than I had envisioned for my microgreen vending machine. Once I had the nozzle, I realised that my original plan to use a tire air compressor wouldn’t work because those compressors don’t guarantee a consistent pressure. Setting the target psi of the tire to 40 does not mean the air will be sent in at a pressure of 40 psi. It will likely be sent in at a much higher and dramatically fluctuating pressure. This would be a big problem for my very expensive and hard to replace nozzle, which I did not want to explode.
Eventually I settled on using an airbrush compressor, and merrily cut its wires to insert a relay module to programmatically control when it turns on and off. I did accidentally electrocute myself with 230V in this process, but happily am alive, although my loved ones are now concerned for my wellbeing (I also burnt myself while soldering on this project, so the pursuit of microgreens is more dangerous than you would think). I hooked it up to a series of pipes leading to reservoir of water and nutrients, and hooked up the relay to a raspberry pi.
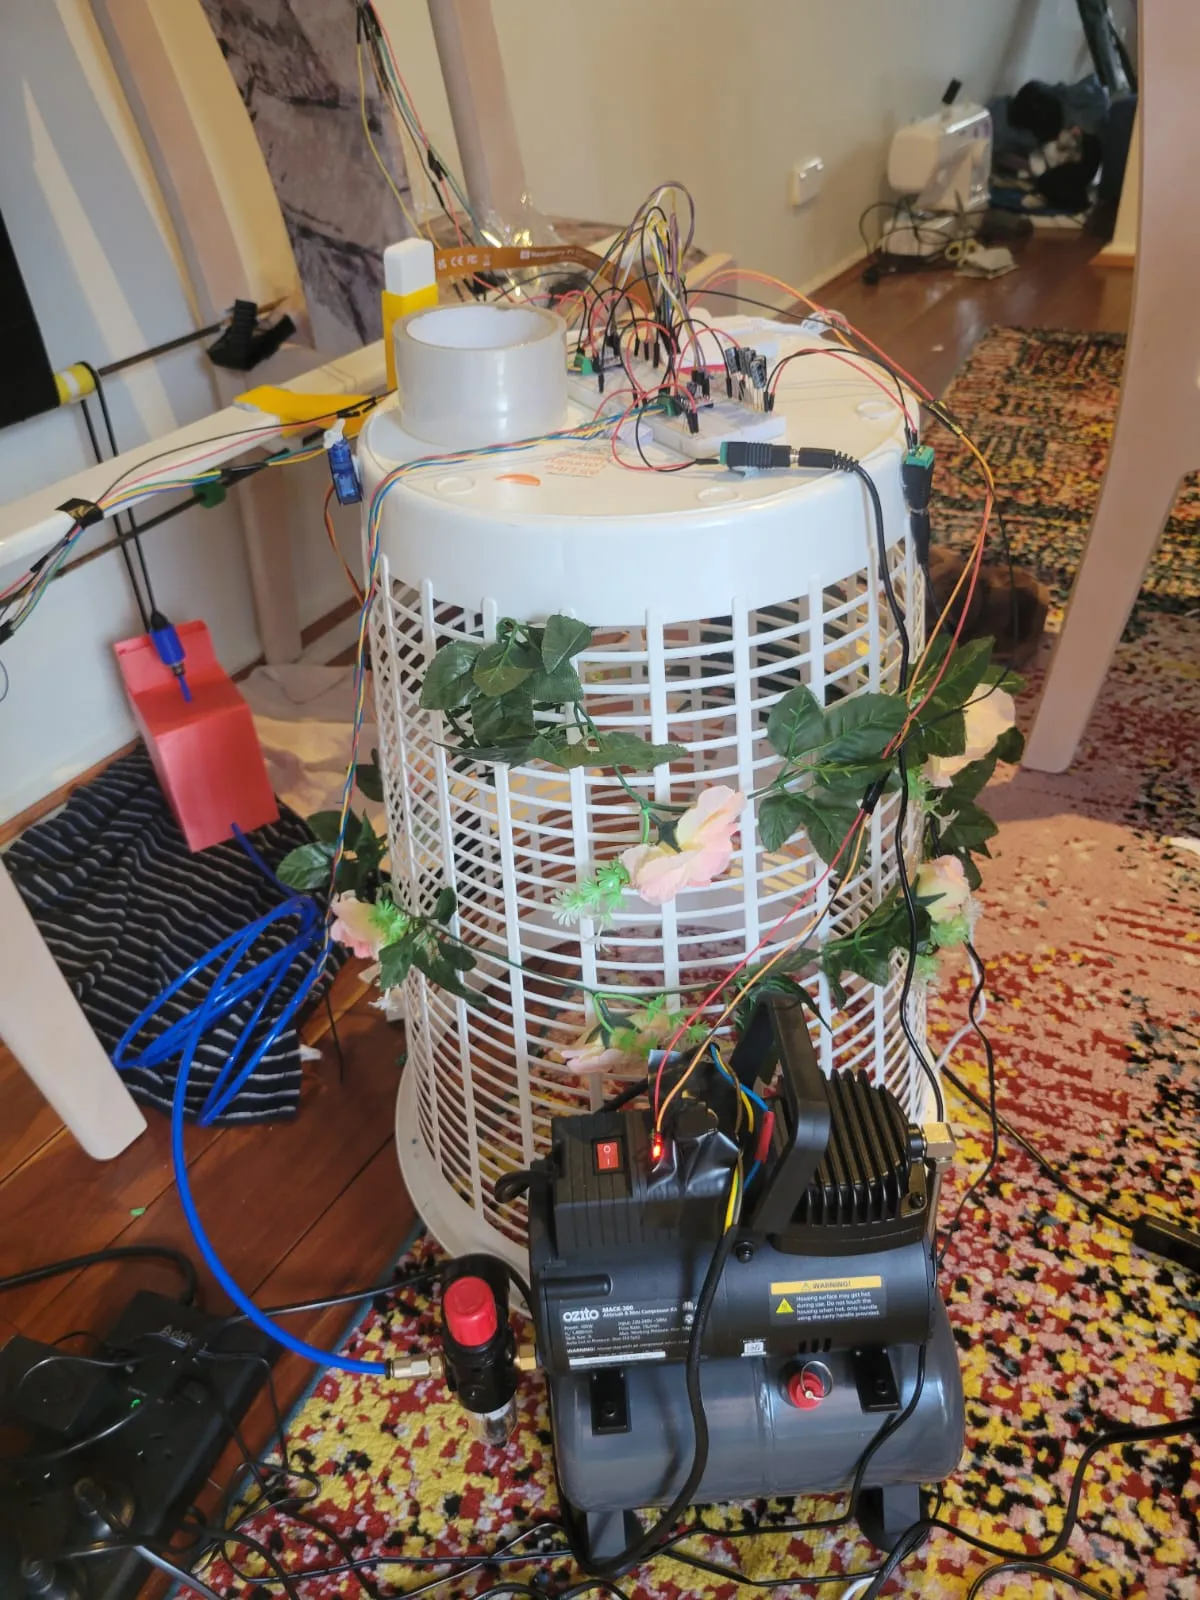 The airbrush compressor, wires cut and relay inserted.
Now for the other piece. I could only afford one spray nozzle in this contraption before completely ruining the economics of the vending machine concept. So, unlike most aeroponics setup, I couldn’t have a nozzle under each couple of plants. If the water can’t go to the plants, then the plants have to come to the water.
This is how I ended up with a vertical conveyor contraption in my living room, with the spray nozzle sitting at the bottom. 3D-printed trays of microgreens are attached to the conveyor, and a camera is pointed at the whole thing. The raspberry pi turns on a motor to move the conveyors. To rotate all the plants to the watering site, the conveyors move so that the tray holder with microgreens on one conveyor lines up with an empty tray holder on the other conveyor at the top of the system, and then a small arm pushes the microgreens tray from one holder to the other. In this way all trays can rotate through the system like a ferris wheel.
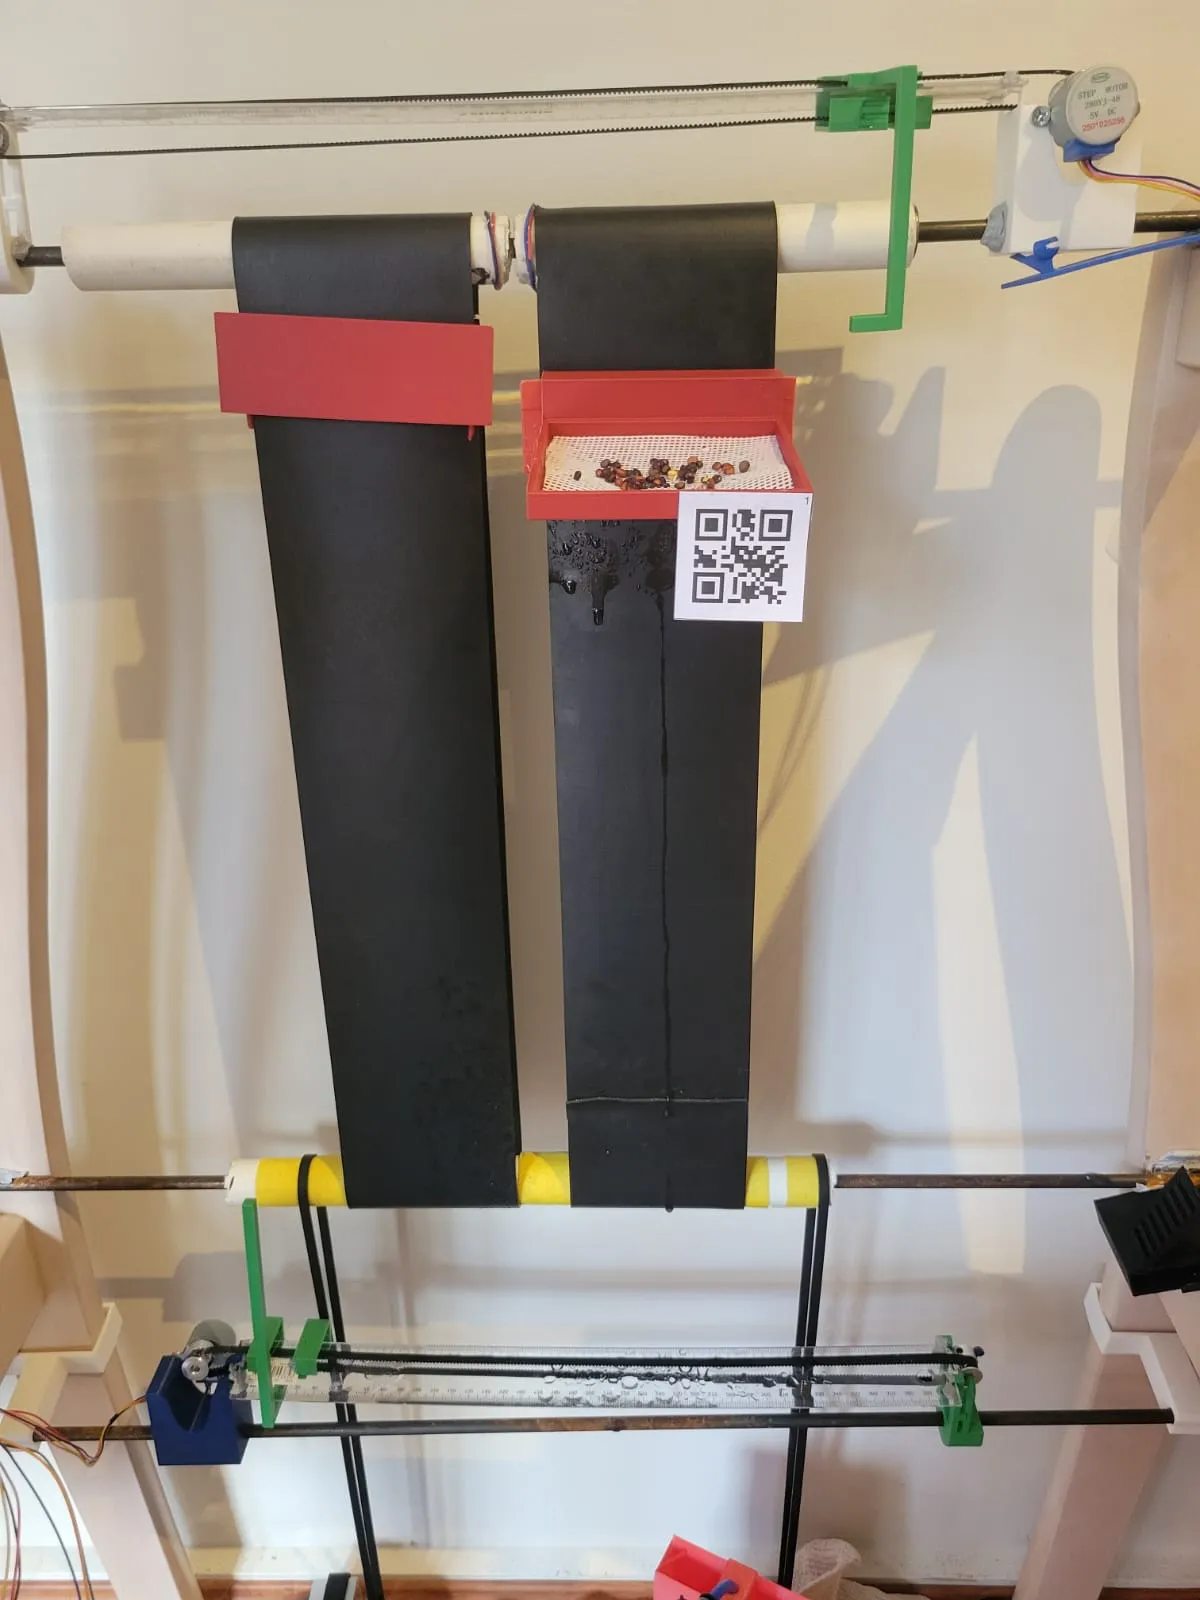 The two vertical conveyors, with a seeded tray riding on the right one.
I won’t go into too much detail on this part, but I will say it was definitely non-trivial. I must have 3D-printed at least 15 iterations of every piece before getting something that worked. The computer vision piece was also a fun challenge - how to determine from the image when a tray and a holder are aligned perfectly, how to move the trays to within a few millimetres of accuracy with cheap motors (answer: PID controller), and how to stop any change in lighting or angle of the camera from messing the whole thing up.
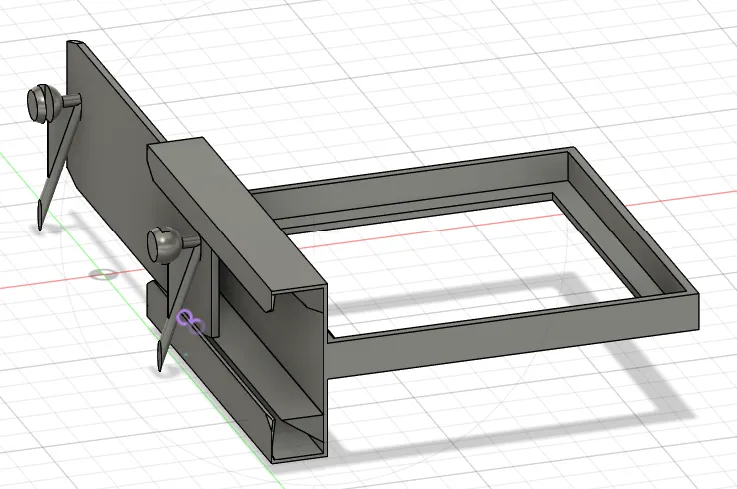 One of the fifteen-odd holder iterations, in CAD.
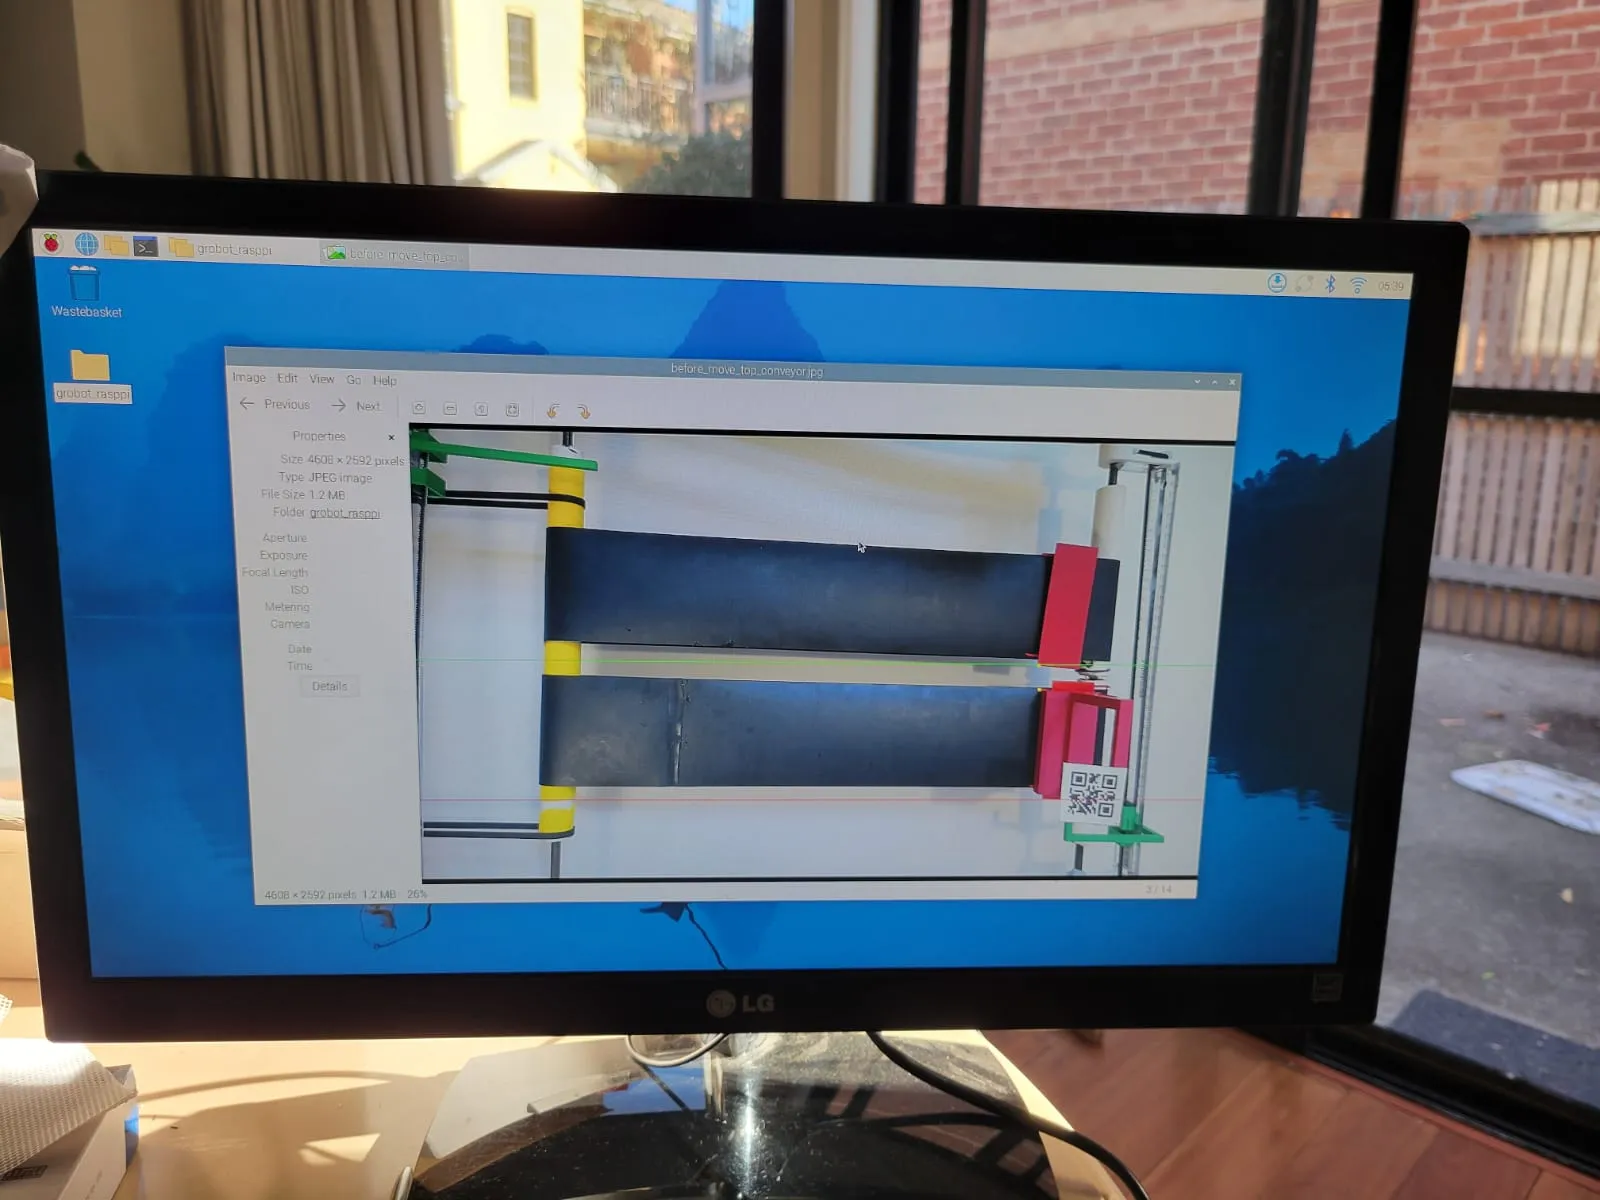 A frame straight off the camera.
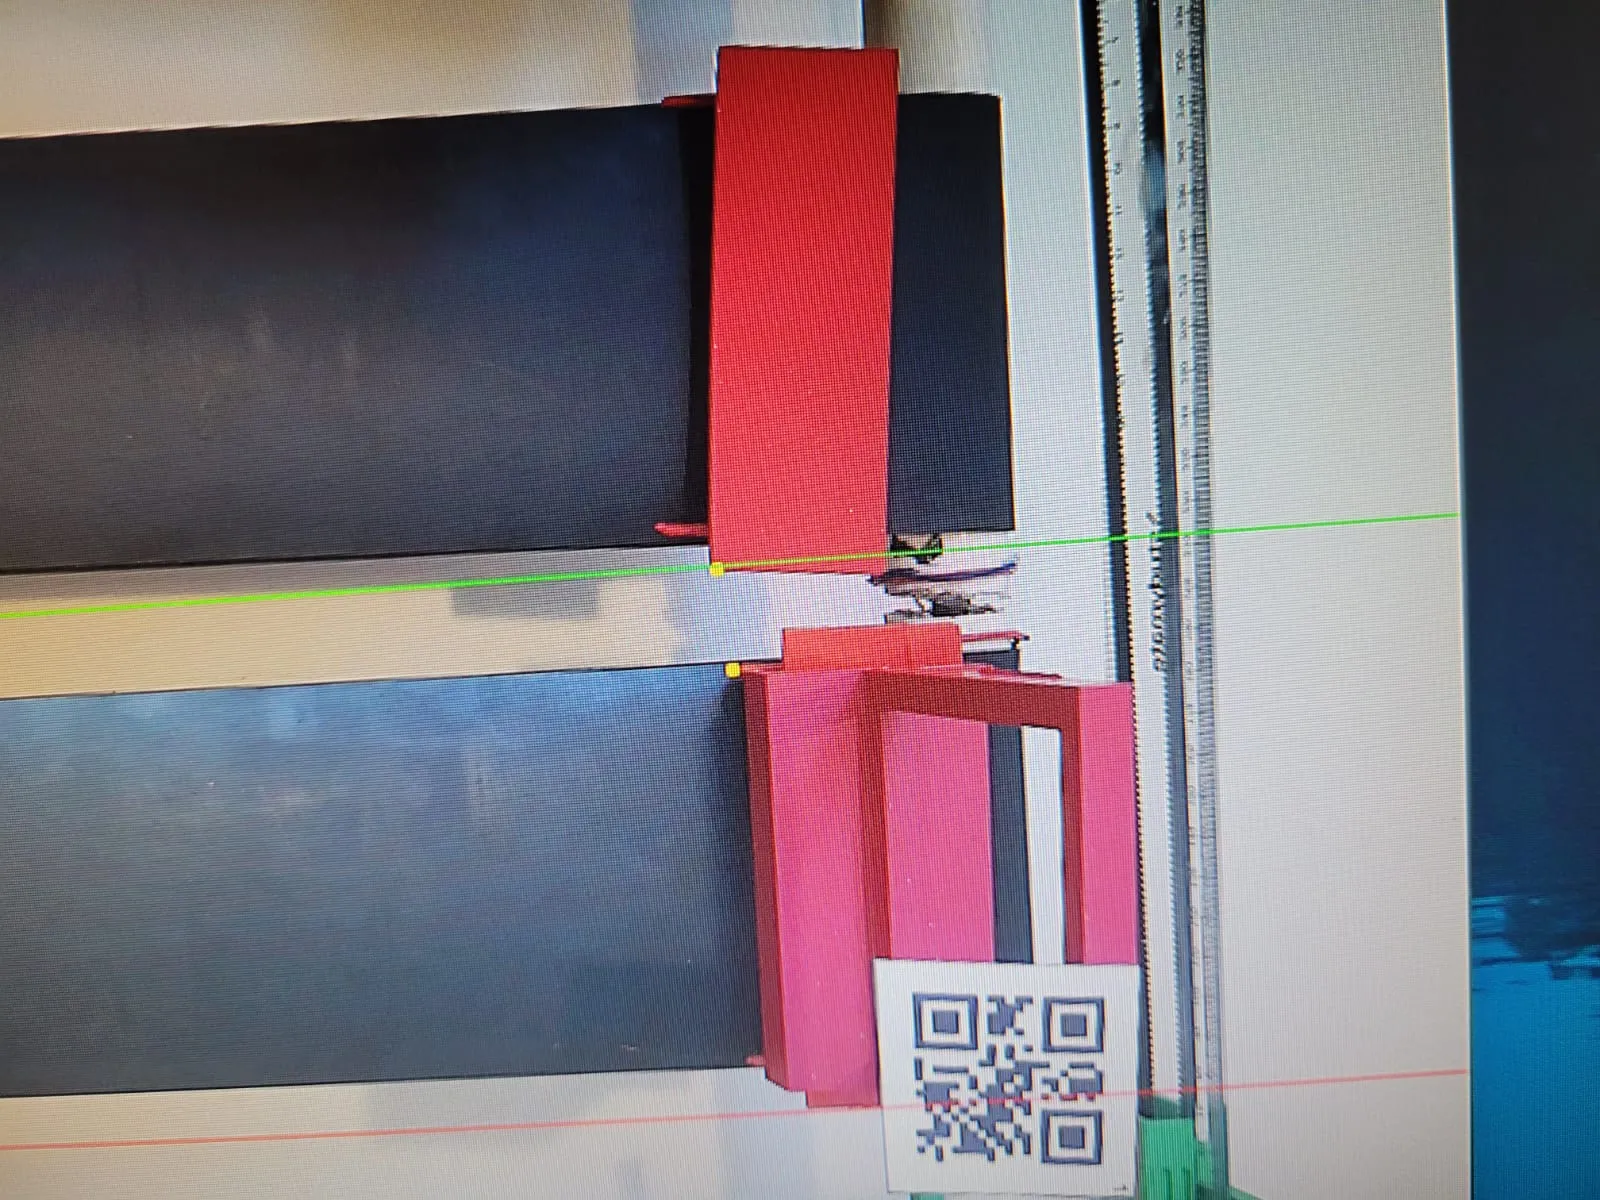 And what the code makes of it - the garish colours, the QR code, and the line the tray needs to land on.
So, the final contraption: two vertical conveyors made of steel bars, PVC pipe, and rubber belts, with sandpaper glued on for friction because the belts kept slipping. Stepper motors at the bottom of each. 3D printed trays and holders that grip onto the belts. Two little horizontal conveyors at the top and bottom that drag a 3D printed leg across to shove a tray from one belt onto the other, like a sliding tile puzzle. A Raspberry Pi Zero 2W running OpenCV watches the whole thing through a camera, finds the parts by their (deliberately garish) colours and a QR code on each tray, and uses PID control to land each tray in exactly the right position to be pushed across. Then the air compressor kicks in at 40 PSI, the nozzle atomizes water and nutrients into droplets under 100 microns, and the roots drink.
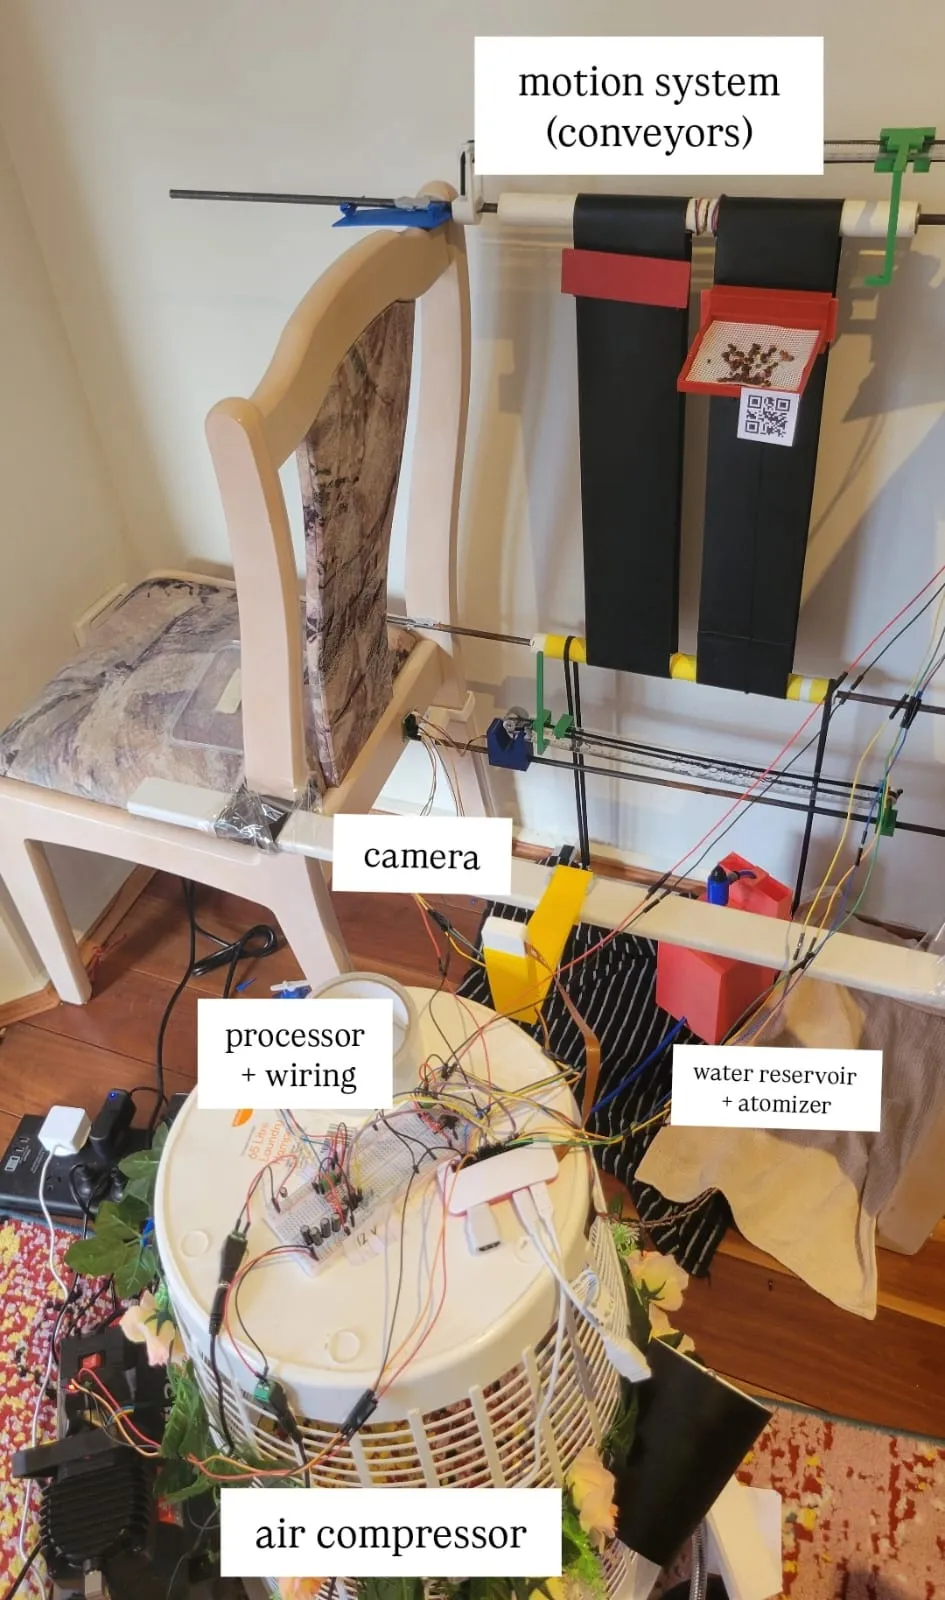 The whole machine, structural kitchen chair included.
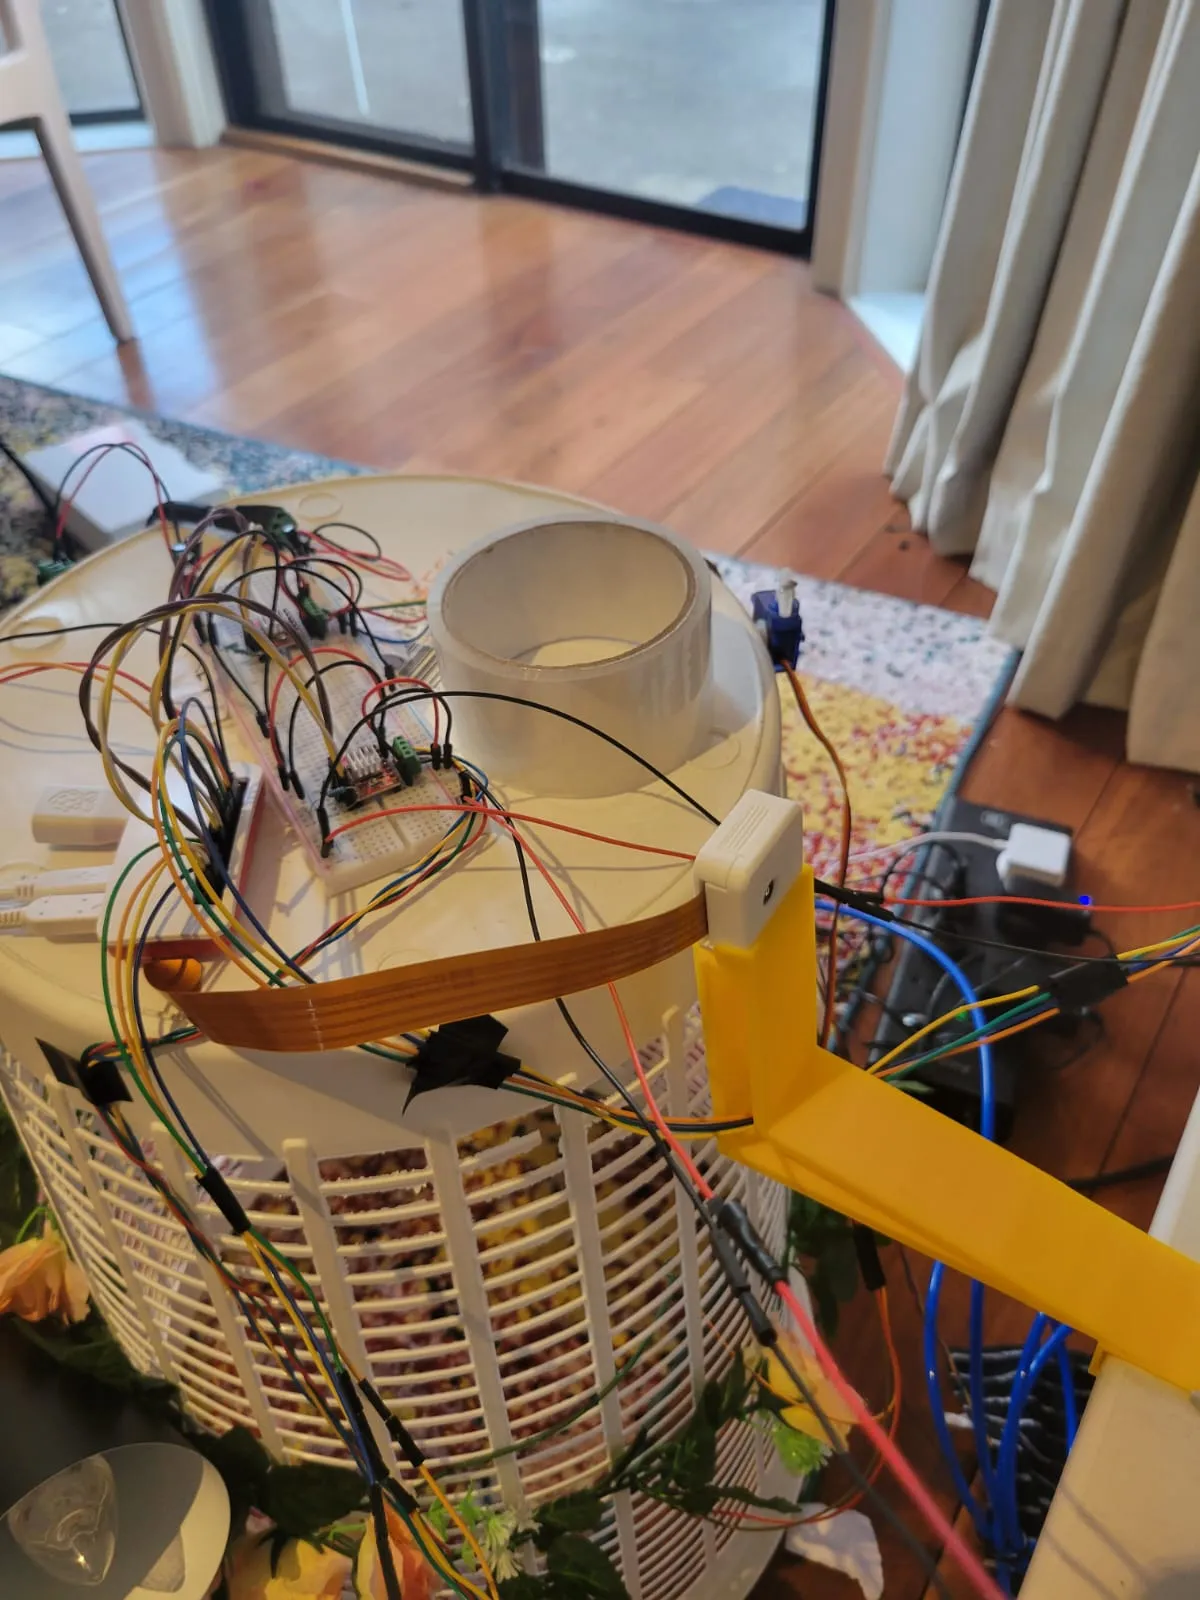 The Pi, the breadboard, and the camera on its mount.
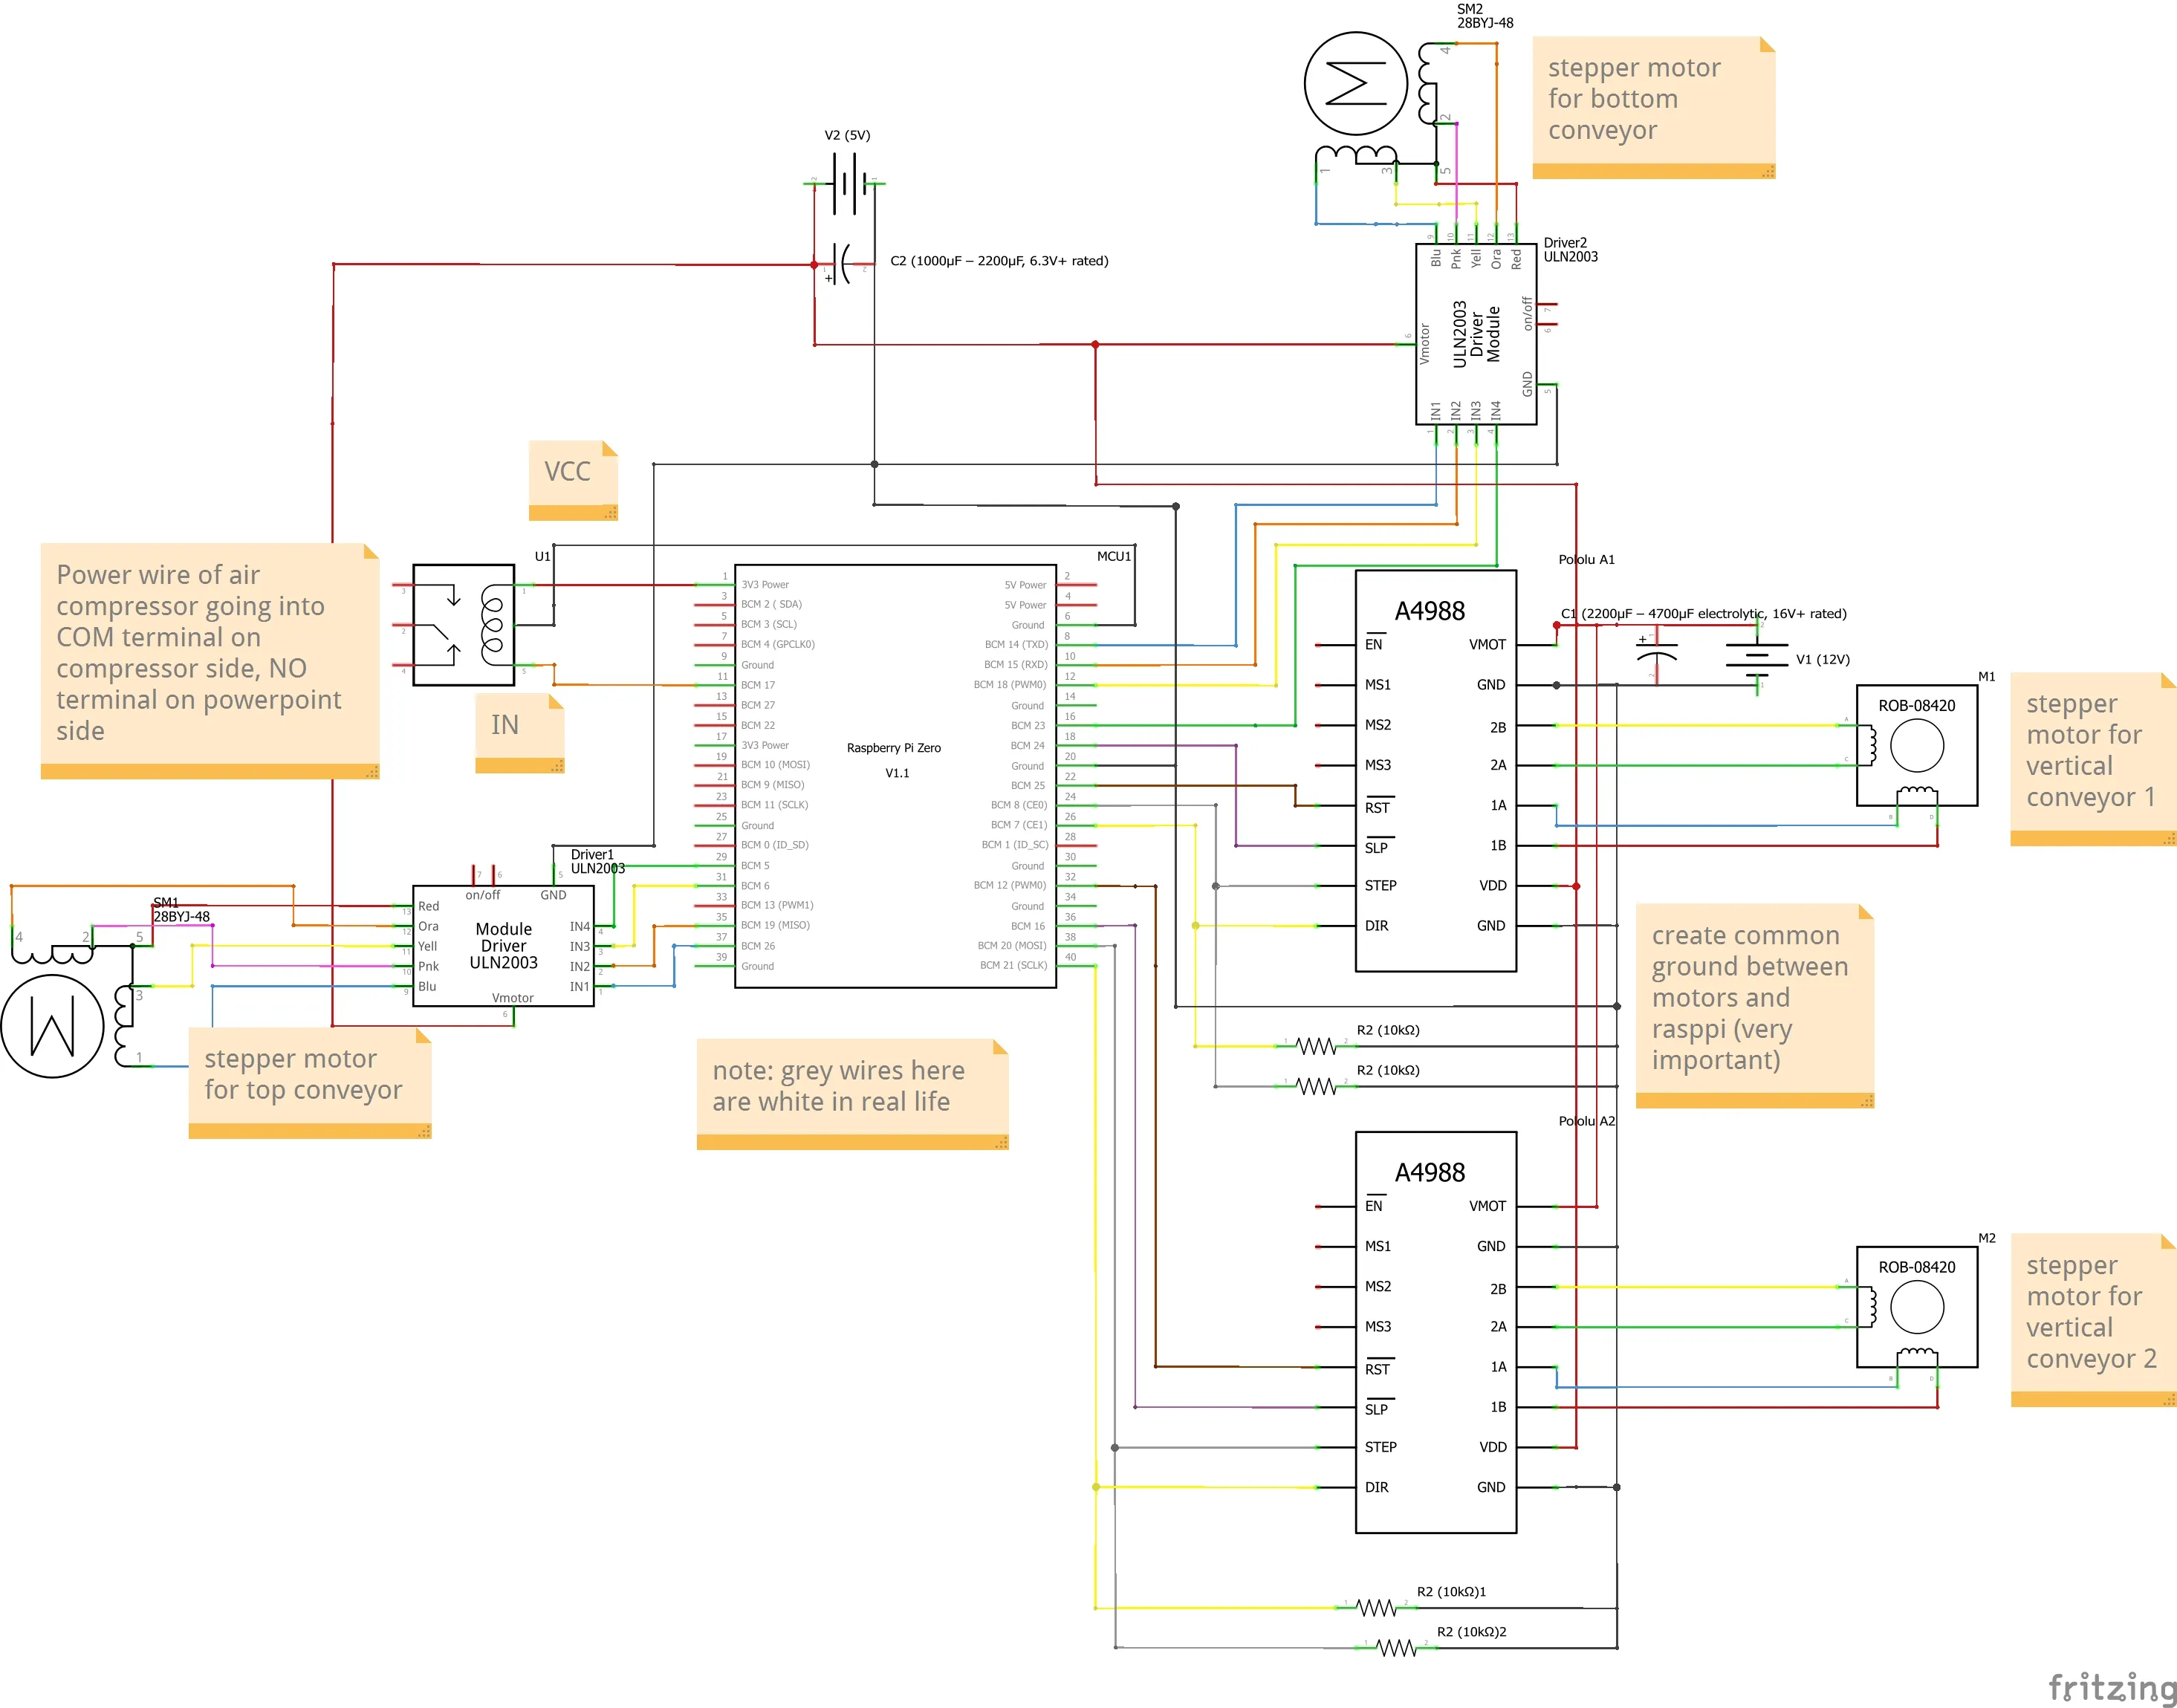 The wiring in full.
The whole prototype came to $733 AUD. The atomizer was $195 of that and the compressor another $129, so the watering system alone was nearly half the machine. Modelling a year of operation at 20 trays, a 7 day grow cycle, and microgreens selling at $100/kg, the machine pays itself off around week 31.
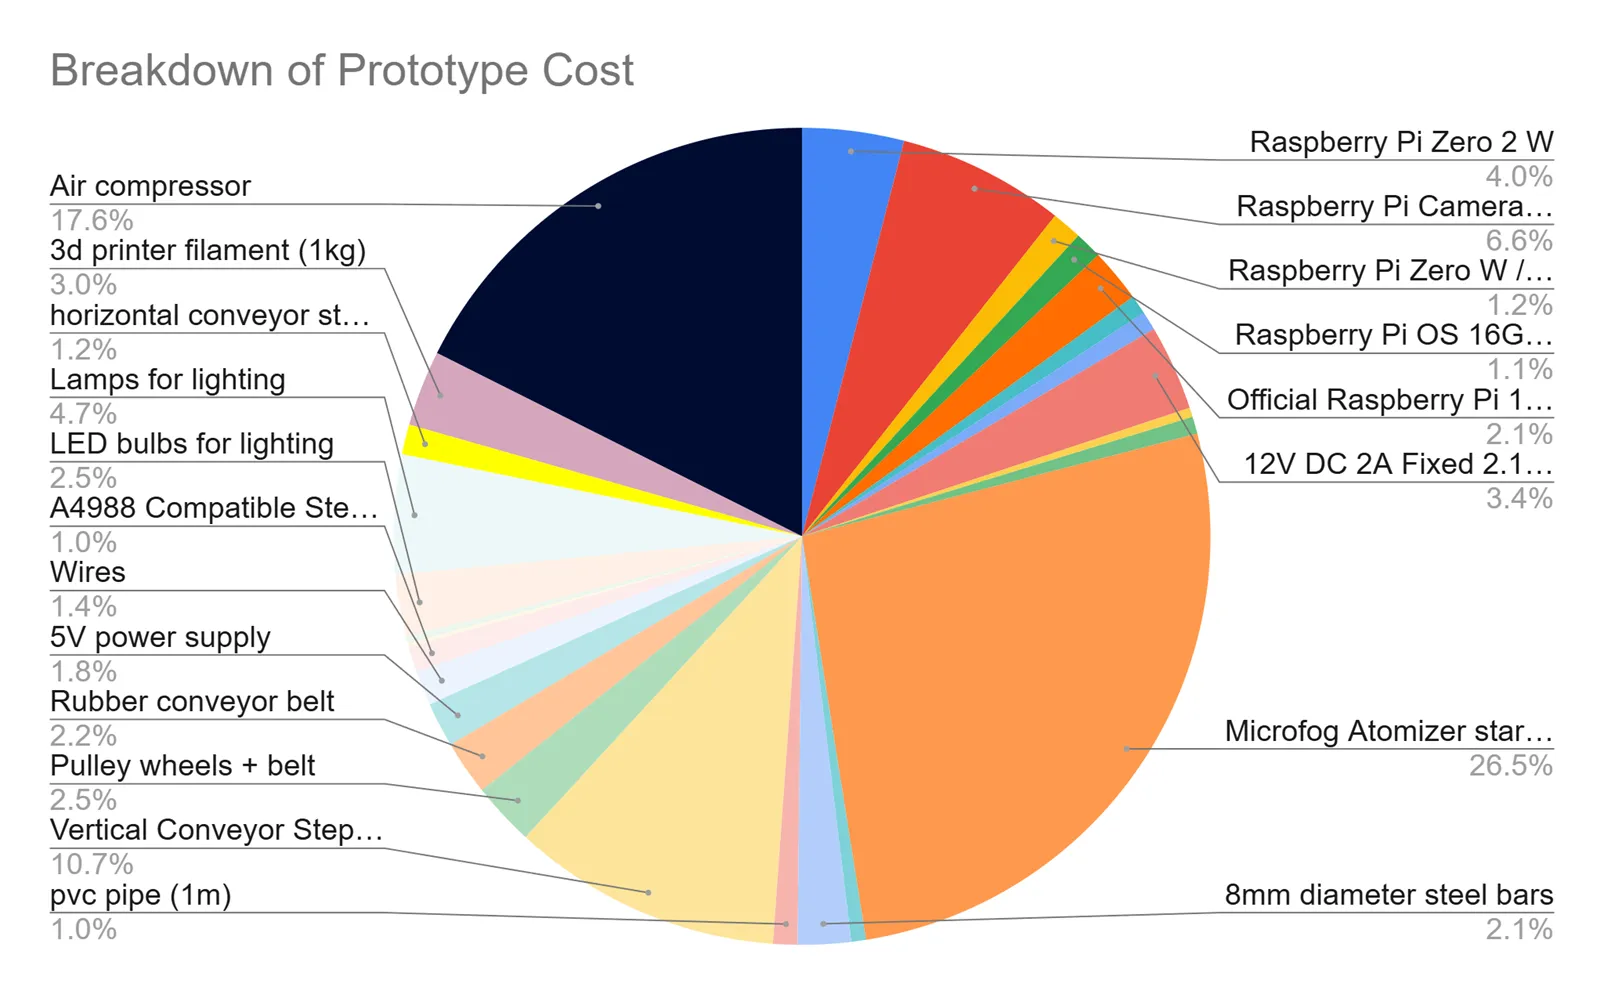 Where the $733 went.
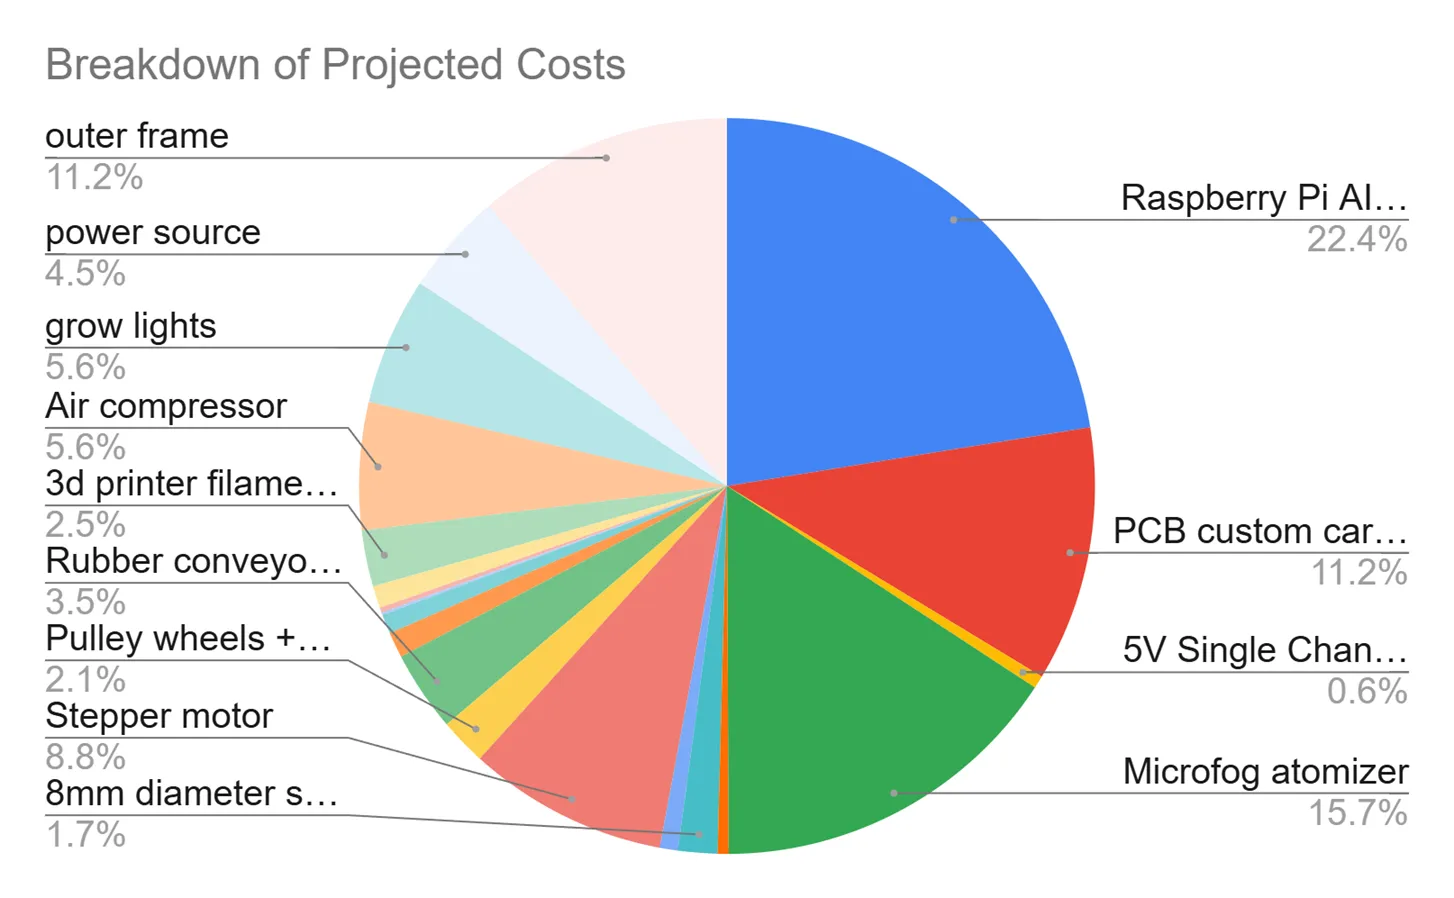 And where $891 would go on a V2 with greater reliability.
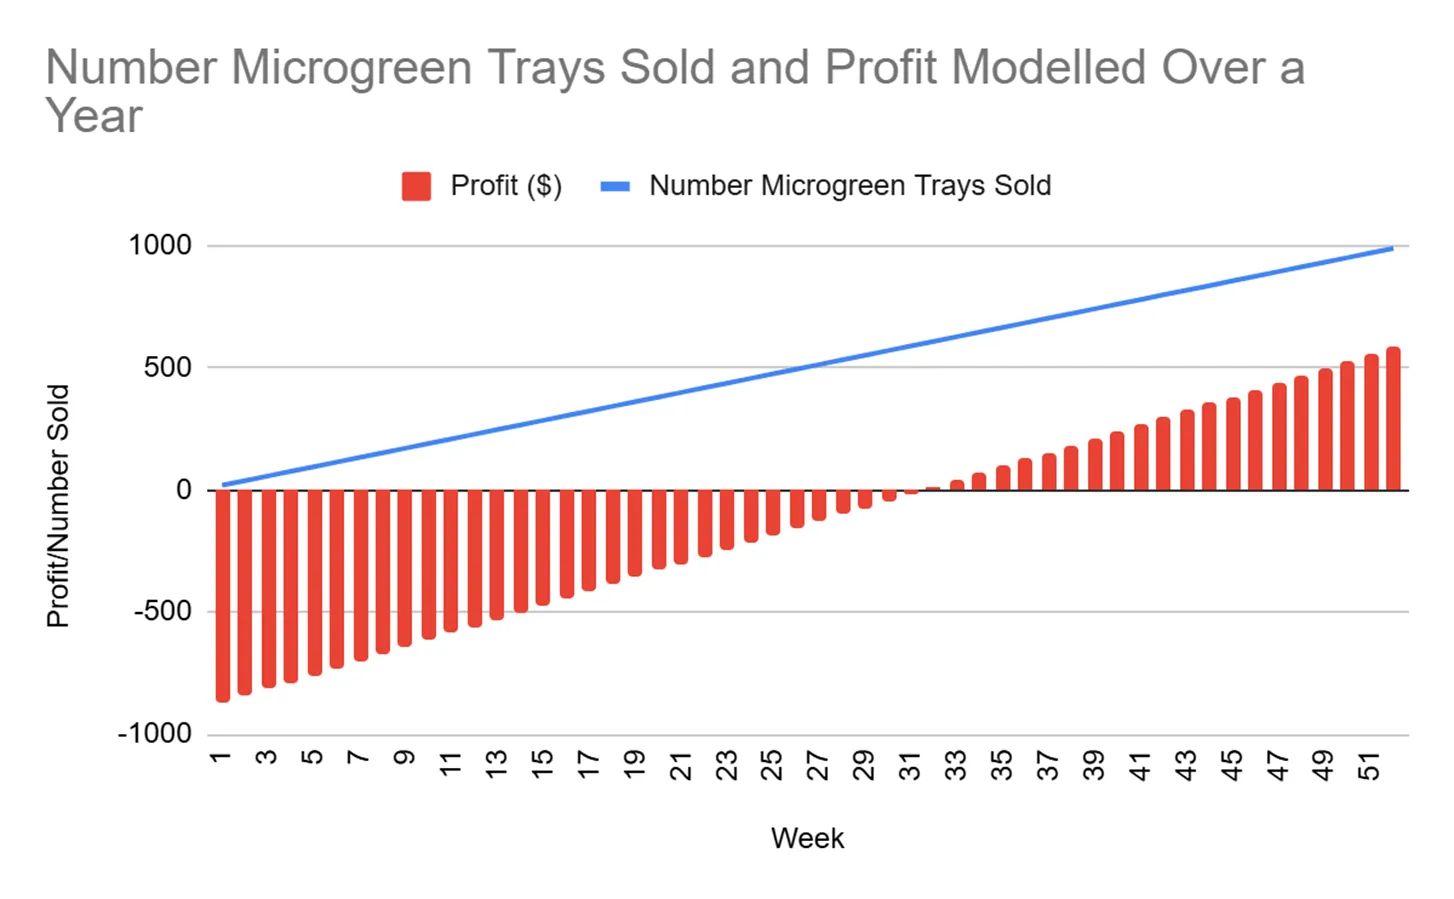 The first year modelled out. Profit crosses zero around week 31.
Those are actually workable economics, which is pretty cool, but they assume almost nothing breaks. Personally I’m not betting a business on that (yet) because things broke CONSTANTLY. The machine proves every individual function, but I couldn’t leave this prototype alone for a week. Lots to be done to make it better - perhaps a V2? But for now I should probably clear some space on my kitchen table, which has been covered in wires and 3D printed components since the beginning of this saga.
Sorry to my roommates. Thank you for never once suggesting I move it into my own room, where it obviously belonged.